10 Steps to Winterize Your Hot Tub
We certainly hope you can keep your hot tub open year-round. After all, what’s better than a dip in your spa on a cold winter evening? Not much! But if you do choose to close your hot tub for the winter, follow along as we show you how to winterize a hot tub in 10 easy steps. Doing so will help avoid broken plumbing from freezing water, and make for an easy opening next year.
1. Turn off Power to the Hot Tub
Before draining or servicing your hot tub, it is critical that you shut off power at the breaker. This will keep you and your hot tub out of harm's way as you begin the closing process. Remember, electricity and water do not work well together, so use caution whenever you're working around your hot tub's electrical areas.
2. Drain the Hot Tub
Connect a garden hose to the attachment inside the equipment access area of your hot tub. Once the hose is connected, turn the valve to drain the water. Use a sump pump to drain any water that wasn't flushed out of the hose.
3. Drain the Air Blower
The next step in winterizing a hot tub is to drain the air blower. If your hot tub does not have an air blower, skip ahead to step number 4.
Begin by putting your hot tub's cover on, and then plug the hot tub back in and turn it on. Once the hot tub is covered and turned on, activate the air blower function and let it run for about a minute to flush the water out of the channels. After draining the air blowers, safely turn off and unplug your hot tub once again.
4. Loosen Unions On The Heater And Pumps
Open up your hot tub's access panel and locate the pumps and heater. Loosen the pump and heater unions to enable any remaining water to drain from the lines. Repeat this process on all pump unions if your hot tub has more than one.
5. Remove Pump Drain Plugs
Remove the lowest drain plug from the front of each pump. This allows any remaining water to drain from the inside of your hot tub.
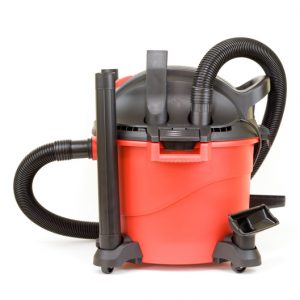
6. Use A Wet-Vac To Remove Water From The Lines
Next up in winterizing a hot tub is to remove water from the plumbing lines. Water left in the plumbing lines can freeze and cause serious damage to your hot tub during winter. To clear out the lines, insert a wet-vac into each drain, jet face, union, suction, and filter cavity. Place the wet-vac in each space for 10–15 seconds to ensure all water is sucked out.
7. Clean Hot Tub Filter Cartridges
Winterizing your hot tub is the perfect time to remove and clean any hot tub filter cartridges! Leaving dirty filter cartridges in your spa over winter will lead to an unpleasant cleanup come spring time. Once you remove the cartridges, spray them down with a garden hose and use a filter cleaner to gently clean off any debris build up.
8. Replace Drain Plug On Pumps
Once all the water is drained out of your hot tub lines, replace the drain plug on the pump. Tighten all unions, and ensure all gate valves are open.
9. Add Hot Tub Antifreeze
The last step before putting the hot tub cover on for the long winter is to pour one gallon of hot tub antifreeze into the top of each pump, and one gallon into the filter cavity. Antifreeze, as the name implies, prevents any remaining water left in the lines from freezing.
After pouring the antifreeze, place the equipment access panel back on if you haven't done so already.
10. Close The Hot Tub Cover
And finally, after all your hard work winterizing your hot tub, it's time to put the cover on, and start counting down the days until you can re-open it!
Winterizing your hot tub may sound like a daunting process, but with these 10 easy steps, you'll have it done in no time. If you have any further questions, the experts at Leslie's are always on hand to answer them. Find your nearest Leslie's location online, or call our service department to schedule an appointment with a qualified technician.