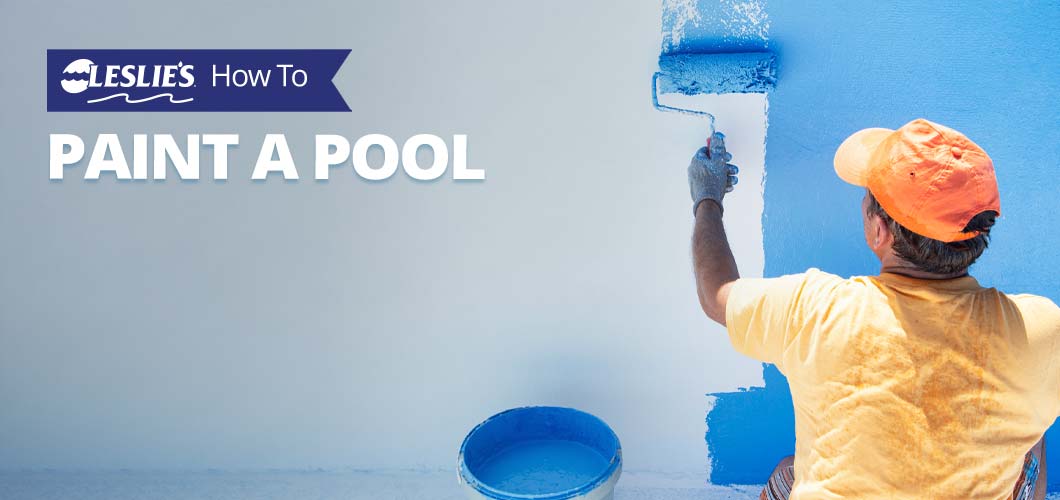
How to Paint a Pool
We all know the importance of caring for the technical aspects of our swimming pool. From water chemistry tests to equipment repairs, regular maintenance is key to a healthy, long-lasting pool. But what about the cosmetic parts of your pool? If your once-vibrant pool is looking a bit lackluster, it may just need a fresh coat of paint! While painting a pool is a rather time-consuming endeavor, the final product is well worth the elbow grease and patience it takes to get there.
Choosing Your Pool Paint
Choosing the best paint for your pool goes beyond picking a pretty color. Much like exterior paint for your house, there are paints made specifically for your swimming pool. In general, the first step in selecting your new hue is to determine which paint base your pool needs.
Paint Base Material
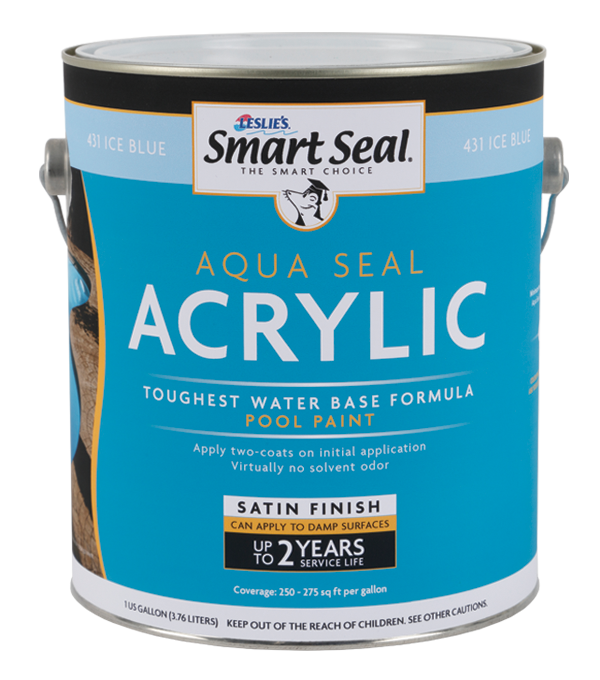
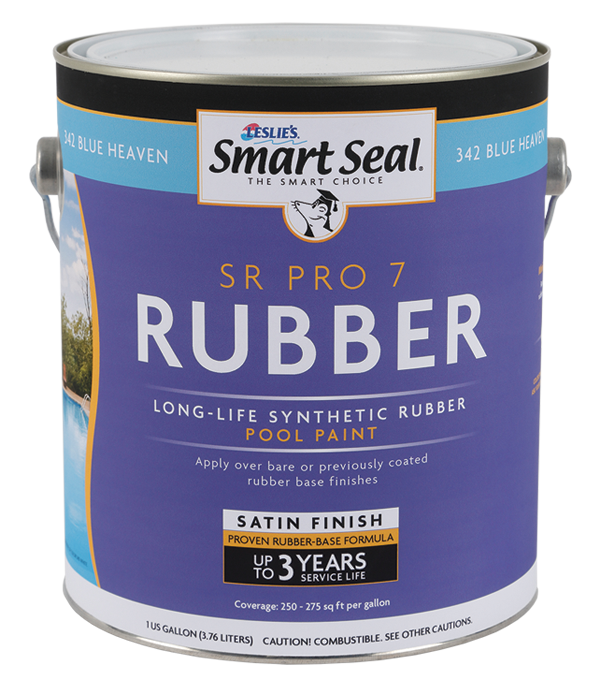
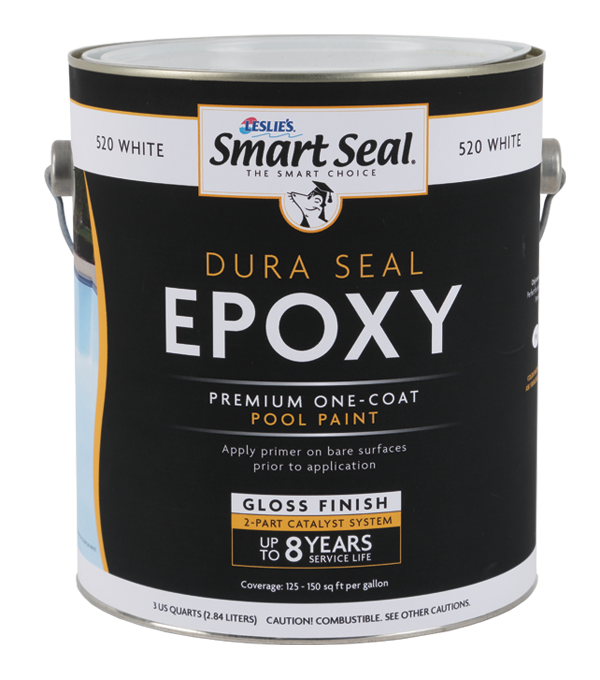
Previously painted pools need to be repainted with the same paint base. This means you need to paint an epoxy pool with epoxy coating, and a rubber-based pool with rubber-based coating. Of course, the exception to this rule is if you're using an acrylic paint. While we recommend using the same paint base as what is currently on your pool, you can paint over epoxy or rubber-based paint with acrylic paint. However, the downside of acrylic paint is its shorter lifespan — only about 2 years of service life. Although for bare, unpainted plaster, concrete, gunite, or fiberglass pools, epoxy paint is the best option, lasting upwards of 8 years.
If you don't have a record of what coating is on your pool, use this test to figure out whether your current pool paint is acrylic, rubber-based, or epoxy paint:
- Chip off a small piece of paint from your pool and submerge it in isopropyl alcohol. Acrylic coating will dissolve in isopropyl alcohol.
- When the piece does not dissolve, get a new chip of paint and submerge it in a rubber-based solvent like Xylol or acetone. If the chip dissolves, the paint is rubber-based. If it does not dissolve, the paint is epoxy.
Paint Color
Undoubtedly, the most enjoyable part of painting your pool is picking the color! Whether you stick to the same color, or go with a new shade, Leslie's Smart Seal collection offers beautiful, vivid hues. Epoxy, acrylic, and rubber-based paints are available in Blue Heaven, Ice Blue, and White, as seen below:
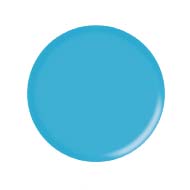
Blue Heaven
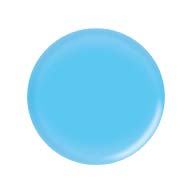
Ice Blue
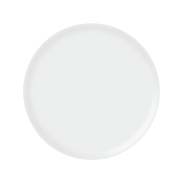
White
Click to download Leslie's Smart Seal Pool & Deck Paint Guide
How Much Paint Will You Need?
Before you get started, you'll need to make sure you have enough paint on hand to finish the job. But how much will you actually need in order to cover your pool?
Calculating the Square Footage of Pool Surfaces
To begin with the painting process, grab a calculator and a measuring tape. Now that you're figuring out the approximate painting area in your pool, you'll need to do a bit of math.
Rectangle Pool
Length x Width x 1.6 = Total Square Feet
Oval Pool
Length x Width x 1.65 = Total Square Feet
Lazy L Pool
Length x Width x 1.65 = Total Square Feet
Freeform or Kidney-Shaped Pool
Length x Width x 1.6 = Total Square Feet
No calculator? No problem! Generally, you can use this quick reference chart to get a close estimate for the paintable area of your pool surfaces:
| Length x Width | Rectangle (sq. ft.) | Oval (sq. ft.) | Lazy L (sq. ft.) | Freeform / Kidney (sq. ft.) |
|---|---|---|---|---|
| 12' x 18' | 345.6 | 356.4 | 356.4 | 345.6 |
| 12' x 24' | 460.8 | 475.2 | 475.2 | 460.8 |
| 14' x 28' | 627.2 | 646.8 | 646.8 | 627.2 |
| 15' x 30' | 720 | 742.5 | 742.5 | 720 |
| 16' x 24' | 614.4 | 633.6 | 633.6 | 614.4 |
| 16' x 30' | 768 | 792 | 792 | 768 |
| 16' x 32' | 819.2 | 844.8 | 844.8 | 819.2 |
| 16' x 40' | 1024 | 1056 | 1056 | 1024 |
| 18' x 33' | 950.4 | 980.1 | 980.1 | 950.4 |
| 18' x 36' | 1036.8 | 1069.2 | 1069.2 | 1036.8 |
| 20' x 40' | 1280 | 1320 | 1320 | 1280 |
Coverage Area vs. Gallons of Paint
A 5-gallon bucket of Leslie's Smart Seal Aqua Seal Acrylic paint covers roughly 1,250 sq. feet, and requires two layers. The 5-gallon bucket of Smart Seal SR Pro 7 Rubber paint also covers 1,250 sq. feet, and requires at least two initial coats. Smart Seal's Dura Seal Epoxy paint offers up to 750 sq. feet of coverage per 5-gallon bucket, but only requires one coat. To figure out how many gallons you'll need, divide the coverage by the number of layers required, then divide that number from your pool's square footage.
For example, if using SR Pro 7 Rubber paint in your pool, 1,250 sq. ft. of coverage divided by 2 coats equals about 625 sq. ft. per 5-gallon bucket. If painting a 12' x 26' rectangular pool (12 x 26 x 1.6 = 499.2 sq. ft.), you would only need a single 5-gallon bucket. For a slightly larger pool, a 14' x 28' rectangle (14 x 28 x 1.6 = 627.2 sq. ft.), you'd need just a smidgen more than 5 gallons of paint. In most cases, you can find 1-gallon cans, too.
Pool Paint Conversion Chart
If using Smart Seal pool paints from Leslie's, here are the approximate conversions for coverage area to gallons of paint required:
| Total Painted Surface Area | Gallons of Smart Seal Aqua Seal Acrylic | Gallons of Smart Seal SR Pro 7 Rubber | Gallons of Smart Seal Dura Seal Epoxy |
|---|---|---|---|
 |
 |
 |
|
| 300 sq. ft. | 3 | 3 | 2 |
| 400 sq. ft. | 4 | 4 | 3 |
| 500 sq. ft. | 4 | 4 | 4 |
| 600 sq. ft. | 5 | 5 | 4 |
| 700 sq. ft. | 6 | 6 | 5 |
| 800 sq. ft. | 7 | 7 | 6 |
| 900 sq. ft. | 8 | 8 | 6 |
| 1000 sq. ft. | 8 | 8 | 7 |
| 1100 sq. ft. | 9 | 9 | 8 |
| 1200 sq. ft. | 10 | 10 | 8 |
| 1300 sq. ft. | 11 | 11 | 9 |
| 1400 sq. ft. | 12 | 12 | 10 |
Pool Painting Prep Steps
Painting your swimming pool is not as simple as painting a bedroom or bathroom. A lot of work goes into preparing your pool for paint, and it's important to prepare your pool properly to ensure a quality finished project.
1. Plan Ahead
Getting your timing right is the most crucial part of painting your pool. Not only does it take a few days to complete the project, but the weather, time of day, and temperature all play a role in how smoothly your pool painting project will go. Before you start the following steps, make sure you're starting this project during the right time of year, and that no bad weather is on the horizon.
There is no ideal temperature for pool painting, but avoid temps above 85ºF and below 40ºF. Depending on what part of the country you live in, spring is typically the best time to paint your pool. Additionally, check for strong winds, high humidity, or storms coming your way. You don't want to be dealing with debris falling into your pool and sticking to fresh, wet paint.
2. Drain Your Pool
Draining your pool is the biggest and most time-consuming part of preparing your pool for a fresh coat of paint. Before you start draining, contact your local municipality and ask about water draining rules. Then, use a submersible pump to remove the pool water. Take special care to direct the water downhill or away from the pool — an elevated water table or water running under the pool structure can lead to major problems while it's empty. For more information on pool draining, check out our blog post, Pool Draining 101. You can also hire a professional to do the job for you if you're not comfortable taking on the task.
As your pool drains, use a pool brush and telescoping pole to brush down the walls and loosen any dirt or debris. Not only will the debris conveniently drain out with the pool water, but it will save you time during the next step.
3. Clean and Repair Your Pool
Once you're done draining, it's time to clean off the surface of your pool. Consequently, painting over a dirty surface will result in poor paint adhesion, and the need to repaint your pool again even sooner. The best way to clean the pool walls and surface is with Leslie's Smart Seal Prep Wise Clean & Etch. This product, which can be used on concrete, gunite, fiberglass, and plaster, cleans and etches your pool's surface in one simple step.
Prep Wise Clean & Etch is an acid etching solution, so wear gloves, closed-toed shoes, and safety goggles while handling. Dilute one gallon of Clean & Etch with one gallon of water in a bucket, then wash the walls and floor of your pool with a pool brush. When every square inch has been scrubbed, simply rinse off the solution, and drain the excess water from the pool. Once the pool surface dries, cover light fixtures, railings, and tiles with painter's tape. Additionally, use this time to fill any cracks in the structure of your pool with a bit of epoxy filling before painting your pool.
Prime the Surface
Prior to putting fresh paint on a bare or rough surface, adding a primer base layer is key. Smart Seal Prime It Bare Surface epoxy primer is perfect for unpainted concrete or plaster pools. The Bare Surface primer seals and smooths your pool's surface for a clean and even application of the Dura Seal epoxy paint. For rough concrete, plaster, or sandblasted surfaces, Smart Seal's Rough Prime is the way to go. Also an epoxy-based primer, Rough Prime's dense adhesive formula smooths and fills your pool's surface for a polished, uniform look.
For pools already coated with an acrylic paint, you don't need to prime the surface before adding additional layers of acrylic paint. The same applies to pools with a rubber-based coating.
How to Paint Your Pool
Now that your pool is drained, cleaned, and primed, it's time to paint. After all that laborious prep work, painting your pool will seem like a walk in the park! Head to your local Leslie's and hardware store to pick up the following items.
Needed Materials
- High-quality 9" roller brushes with a solvent-resistant core
- Telescoping brush pole
- Medium-sized angled paint brush
- Gloves
- Safety goggles
- Clean, closed-toed shoes
- Ventilated face mask (optional)
Pool Painting Steps
Paint fumes can irritate your lungs and eyes, so we recommend wearing a ventilated face mask and goggles while painting. Once you have your mask, goggles, gloves, and clean shoes on, assemble the roller brush and telescoping brush pole.
To begin with, start in the deepest end of your pool, and paint the floor and walls of your pool with slightly overlapping brush strokes. Then the small, angled brush to paint corners and around light fixtures or other features. The application process varies for epoxy, acrylic, and rubber-based paint, so refer to the instructions on the label to ensure correct usage.
Smart Seal Dura Seal Epoxy paint is the most straightforward paint to apply, and only requires one layer. However, if you're using the Acrylic Aqua Seal, dilute the first layer 10% with fresh water. Once the first coat is completely dry, add the second layer at full strength. For the SR Pro 7 rubber-based paint, apply a thin initial layer to your pool, then a second thin layer when the first one dries.
Refilling Your Pool
Now that you've finished painting, and have given the paint ample time to dry, at least 3–5 days, it's time to refill your pool! Put your garden hose into the pool and let it fill up until the waterline is halfway up the skimmer opening. Afterward, test and balance the water chemistry, prime the pump, and turn your equipment back on.
Painting a pool is no easy feat! By the time you go through the arduous prep steps and the long drying time, giving your pool a fresh new look is a time-consuming task. But when all is said and done, the vibrant new look of your beautiful pool will be worth it. Stop by your local Leslie's to see our collection of pool paints, or bring in a water sample for a free AccuBlue® water analysis after refilling your pool.
JUMP IN WITH US ON SOCIAL!